Intro
Market.AdTarget is self-service digital advertising platform.
Still, there is a possibility to access managed service feature if your cabinet monthly turnover exceeds 10k EUR equivalent. If you would like to activate managed service, please, contact our client success team to proceed.
Quick start guide will walk you through the interface and the basic working methods. For more detailed information you can turn to AdTarget platform documentation or contact Support team.
Interface
Upon logging into your account you will see the main menu on the left, reports menu and analytics dashboard:

- On the dashboard you may see a set of graphs and data sets depicting the main KPI
- Campaigns section allows to list existing campaigns and create new ones
- Media section allows to list existing media and create new ones one by one or via multiload
- Pools section allows to list available traffic sources – Ad Networks and SSPs
- Audiences section is where user pixels and retargeting audiences and created and managed
- Macros allows to create own macros to be used in landing URL’s
- Ads Generator allows to create dynamic ads based on templates and data feeds
- Issues section is for communication with support team
- API section provides API documentation for integration with 3p platforms, e.g. analytics dashboard
- Users section gives access to user profile settings, billing information etc
Create Campaign
To create your first campaign go to Campaigns and click Create button on the top of the screen

Campaign is created in 3 steps, in the end of each step press Next button to proceed:
- Add campaign name
- Set bidding step and attach pools and media
- Set targetings
Let’s have a closer look at steps 2 and 3.
Bidding step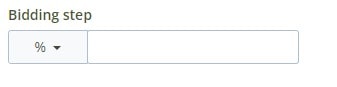
Use this field to control how your campaign will bid in the auctions:
- Step in % will increase the floor price passed by SSP by defined %
- Step in EUR (or other currency) will increase the floor price from SSP by set amount of money
- Step set as ABS – absolute price – will ignore the bid floor and will enter all auctions with fixed price
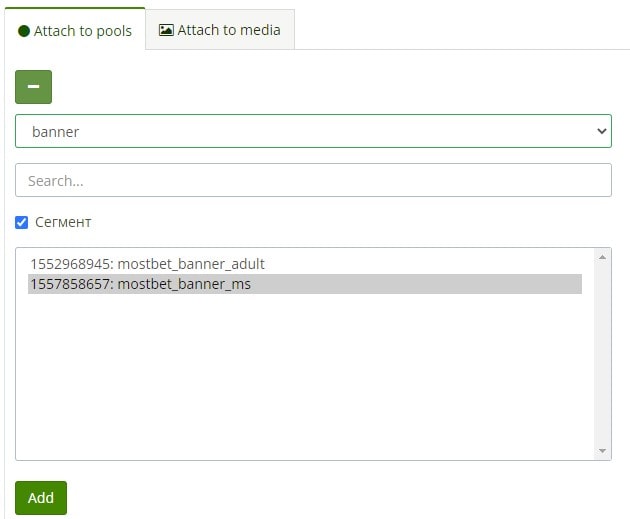
Pools in Market are basically traffic sources grouped by media type (e.g. banner or video) and content topic. Choose the media type from dropdown menu to see available Pools. Then select at least one and click add. Pool will be attached to Campaign.
Attaching media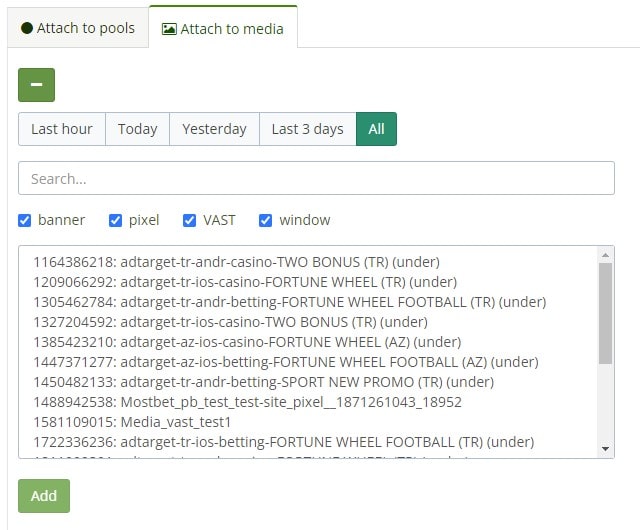
Ads in Market called Media. You need to attach at least one to Campaign, so it would have what to show to the audience. If you have already created Media you can chose them from the list. If not, you can skip this step and add Media later.
IMPORTANT: The type of Poll and Media attached to campaign should correspond each other, otherwise campaign will not run.
Targeting settingsTargeting can be set on Campaign and/or Media level. The basic targeting parameters which used in most of all campaigns are:
- Budget – how much do you want your campaign to spend in total and daily.
- Period – campaign duration. You can set several flights by adding few periods.
- Schedule – select days of the week and dayparts when campaign should be on air
- User limits – cap Impression or Click frequency per user
- Locations – choose target Countries and Cities where campaign should run
- OS - Mobile or Desktop devices
- Languages – select target languages when aiming at multilingual countries
- IAB categories – website category according to IAB classification
NOTE: targeting will only work if its settings form is not collapsed before campaign saving
Create Media
To create your first media go to Media section and click Create button on the top of the screen

Media is also created in 3 simple steps. Click Next button to go to another step:
- Select Type, Format (if available) and Name
- Add Landing URL and upload the creative asset
- Attach Media to Campaign and set media-level targeting (optional)

Optimizer automated rules
Optimizer allows you to automate all the routines related with campaign performance optimization.
- Go to Optimizer section and click Create button.
- Name your rule and click Next.
- Select, what algorithm should perform and how often, e.g. add websites to blacklist every day.
- Add rules which would trigger the action, e.g. if website spent 30 EUR and didn’t bring conversions.
- Save your rule. Now you can attach it to any Campaign or Media via Targeting.

Analytics
Analytical reports provide information on your Campaign and Media performance.
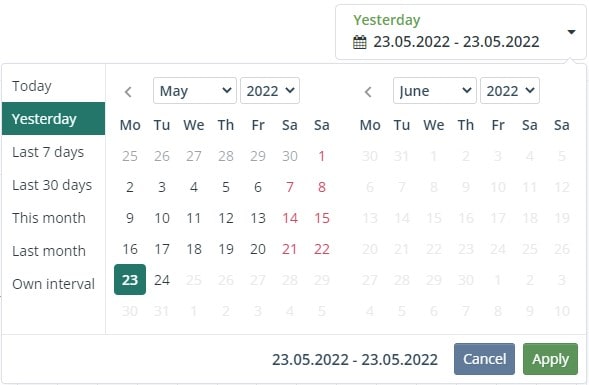
In top right corner above the graph it is possible to set the period for analysis:
In the top left corner, you can apply filters by certain campaigns and/or locations.
In the grouping pane you can select various options how the data should be grouped. Available parameters:
- Campaigns
- Days
- Media
- Operating Systems
- Browsers
- Countries
- Cities
- Domains
- SspSiteIDs
- Hours
- Media Types
- Languages
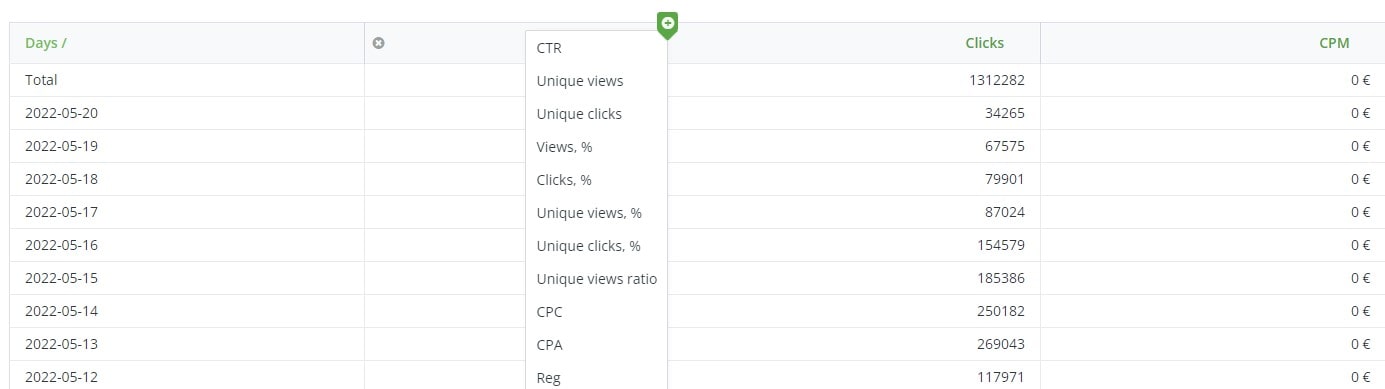
To add more metrics to the report table and the graph click the “+” icon between columns to call contextual menu and select needed metrics:
For your convenience you can save the report to Favorites, Share using web link or Download in CSV using respectively Star, Chain and Download icons in the top right corner:
That’s it! Now you can set your first Campaign, add Media to it, turn on Optimizer and watch how the new clients are arriving via Reports.